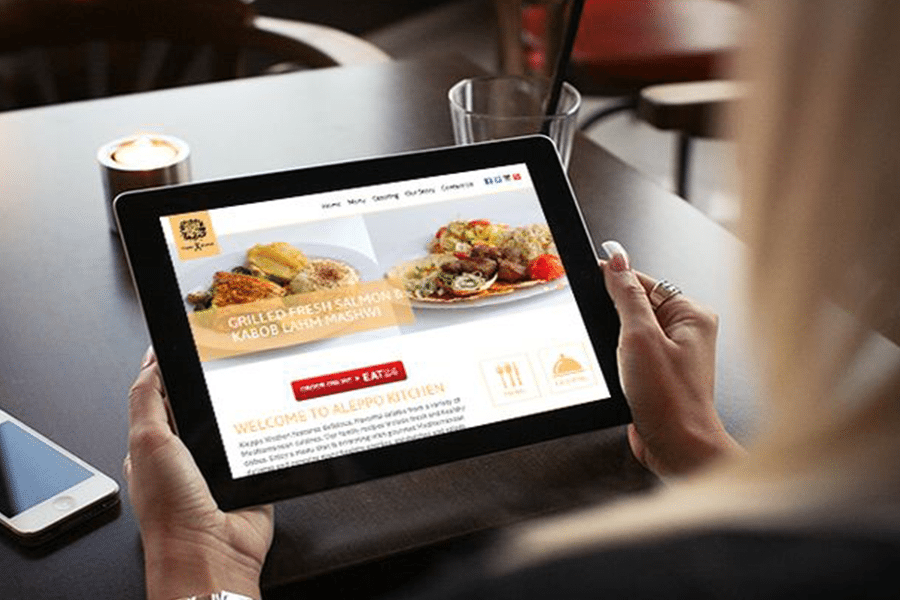
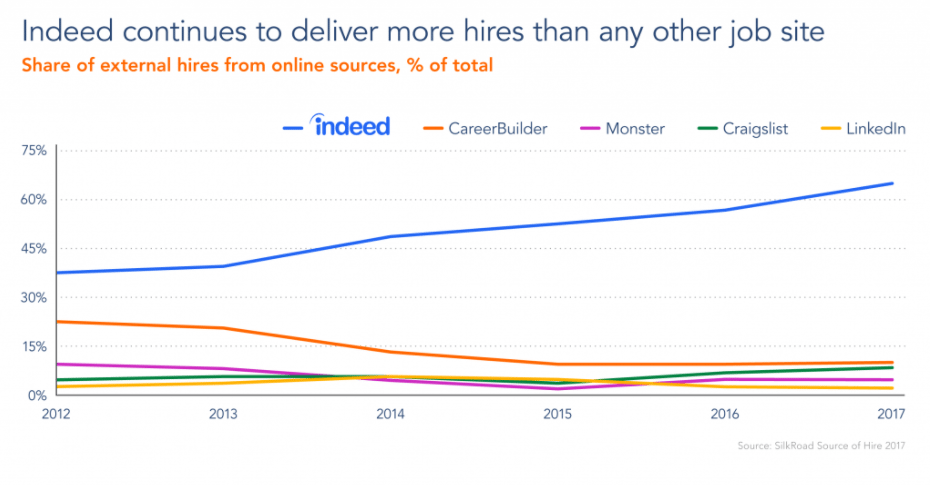
More than 80% of Americans look up restaurant locations and hours online before heading out. By not developing a website, you overlook arguably the greatest source of new clients.
Fortunately, restaurant sites are inexpensive and fairly simple to create. During Bluehost, you can spend as little as $2.95/month (or $35/year) on a complete website package, such as domain name, hosting and company email. You’ll also have access to our easy WordPress template, Combination Web Themes: Restaurant Edition, which comes preloaded with 2018’s essential restaurant site features. It just requires a few clicks to personalize the site with your own branding.
Fit Online Themes: Restaurant Edition
The secret to a successful business website in 2018 is easy . Whether it’s checking your hours, or purchasing online, visitors know what they need before they get there. Your work is to expect these orders, and supply the replies on a quick and easy-to-navigate platform.
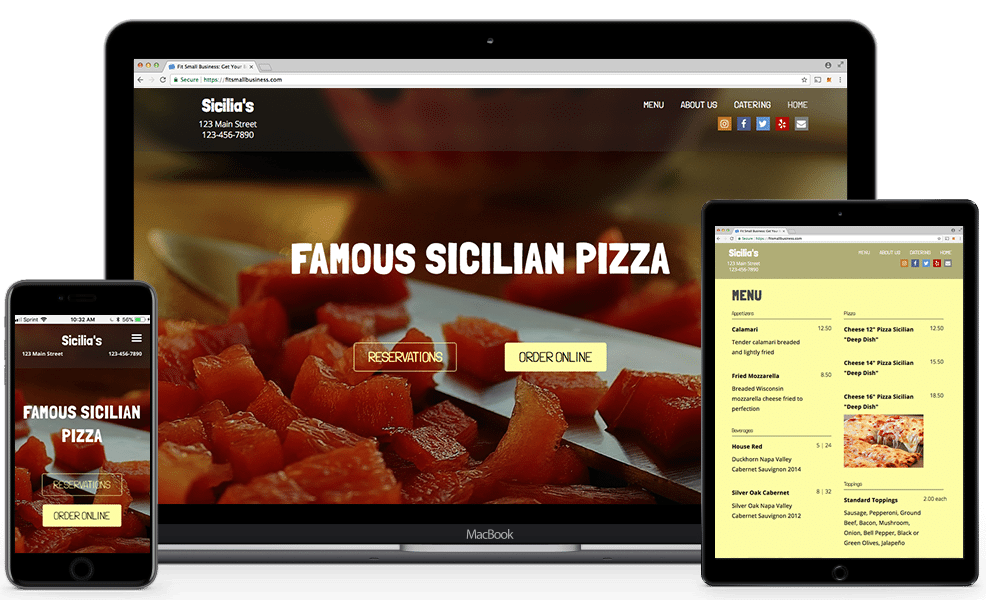
That is why we made Fit Web Themes: Restaurant Edition. It’s all the key components to a restaurant website–like notable contact information, ordering buttons, and cellular functionality– with a modern, appealing and well-functioning layout. As a WordPress theme, you can easily adjust it for your own small business. Just enter your text and photographs, and correct colours, fonts and other characteristics on an easy-to-use menu. There is no coding required.
To utilize our free theme you’ll need a WordPress account. In case you have one , you can jump to installation instructions below. Otherwise, we will show you how to set up a WordPress account alongside. Using Bluehost, you get a WordPress site, customized domain (www.YourSite.com) and business email, all starting at just $2.95/month.
Step 1: Get Your Domain & Hosting
To create a company WordPress site, first you need a hosting plan. We recommend Bluehost since they combine all into one package (site, domain AND expert email accounts) and also offer the best pricing starting at $2.95/month.
To get started, just follow the link and then click on”Get Started Now.” The initial step is to select your hosting package. Their basic plan is only $2.95/month if you sign up for 36 weeks. It needs to be sufficient for many single-location restaurants. Consider the”and” plan only if you want to produce more than 1 site, or need more than 5 business email accounts.
Next, you will choose your website domainname — e.g. www.YourRestaurantName.com. While Bluehost allows you to choose between different extensions, many restaurants elect for a. Com name, since its the very popular and well known. If your best choice is taken, think about adding an excess word, such as your city name, or check out our top 25 domain name ideas for further tips. You can also use the tool below to see what’s available:
Last, you’ll enter your payment info and finalize your order. Keep in mind, so as to get the very best pricing, you need to cover for 3 years back. But, you might even cancel within 30 days for a complete refund.
Step 2: Set Up WordPress
When you’re signed up for Bluehost, then you’ll be prompted to set a password and then confirm your email address. After this, you’ll land on the Bluehost welcome page. Before Beginning working on your site, there is 3 quick steps to finish:

- Click”My Sites” on the left panel, then”Manage Site.”
- Locate the”Settings” panel. In the box which says”Website URL,” alter the temporary URL to the one you just bought. This ensures your new domain name is linked with your new site.
- Click the”Security” tab. From the box which says”Free SSL Certificate” click enable. This will definitely change your site to an”https,” that is better for search engine rankings.
Once those steps are complete, click”Log into WordPress” to start designing your site.
Step 3: Install & Customize Fit Web Themes
Clicking”Log in to WordPress” will direct you to your WordPress dashboard. This is the main’control center’ of your website, where you’ll design your pages, make edits, and add blog articles, etc.. First things first, you need to get Fit Web Topics: Restaurant Edition installed on your website. To do this, hover over”Look” on the menu and click on”Themes.”

Now click”Upload” in the top-right corner:

Now click the button”Upload Theme” in the peak of the display. This ought to open an instant to upload a file. Download Fit Internet Topics: Restaurant Edition here, then upload this Whole .ZIP file on WordPress. Once loaded, click”Install Now.”
Once completed, click”activate.” You’ll now have Fit Web Topics installed on your site and are ready to start designing!
Customization Menu
Designing your website is as easy as adding your name and restaurant information, uploading your photographs (or utilizing our provided rights-free pictures ), and if you like, making simple alterations to the structure and style of the website. Fit Web Themes: Restaurant Edition was designed to be user-friendly as you can. However, it’s also highly customizable: You have full control over colours, fonts, and page formatting, all managed from the easy-to-use customization menu.
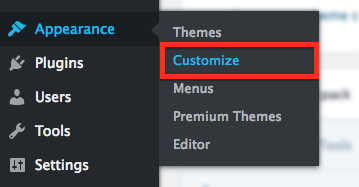
To begin, hover over”Appearances” on the left-hand toolbar, then click”Customize.”
The customization menu has been divided into subsections, such as Header and Social Links. Find directions for each of these by clicking on the links below. If you need assistance on any of these sections, you can also ask a question in our user forum.
Click Box For Instructions
Header
Design the header board to your website. Now you have the option of uploading a logo, or just inputting your restaurant title as text (you will have the ability to adjust the font later.) Under that, input your street address and phone number.
If you still need a logo, check out designers on Fiverr, with pricing beginning at $5.
By default, the header color is transparent black. This allows you to easily browse the white text, while making your background picture visible behind it. If you would like to change the header or text color, simply click the box and use the sliders to correct it.
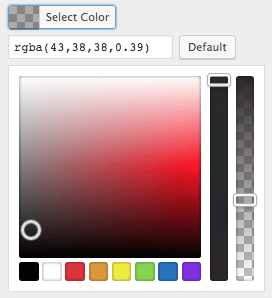
Adjust colors readily using the colour selector and transparency slider.
Social Links
Add social networking icons into the top-right corner of your site. Simply paste your page link under the right area and the icon will automatically appear. There’s also an option to add an email address with a mail icon. If you haven’t created social networking accounts yet, find out about the advantages of Facebook, Yelp, and Instagram for company.
Design
Select your site’s font and colour themes. By default, the site uses Londrina for headers, and Open Sans font for your system. But, you can select various fonts and preview them instantly into the right. Body font is used in paragraph segments like”About” or”Hours.” Your headings font appears in section titles, and sub-headings is used for buttons, and your main navigation menu.
| Body Fonts | Header Fonts |
|---|---|
| Open Sans Josefin Slab Montserrat Playfair Display Comfortaa Vokov Raleway |
Roboto Slab Indie Flower Fjalla One Francois One Londrina Shadow Londrina Strong Acme Shrikhand Satisfy |
Default Background Color will adjust the background colour for specific sections and pages on your own website. The reason it doesn’t change the background colour everywhere is since some sections (such as Location and Gallery) have their own color controllers.
If you would like to use the same background shade across your whole site, just choose your colour, then locate the 6-digit HEX color code. Write this down, or copy it to your clipboard, then apply it everywhere else you want to use this colour.

Copy/paste this code to re-use colours.
Section Order
Click the eyeball to hide a segment, or drag .
Choose which sections you would like to appear in your site, and in what order. Simply click and drag a segment to re-arrange. Or, click on the eyeball icon to remove a section from your site.
Here’s a rundown of the 6 homepage sections available for this theme:
- Hero. Comes with a name, background photo and 2 (optional) buttons. This should almost always appear on top of your site.
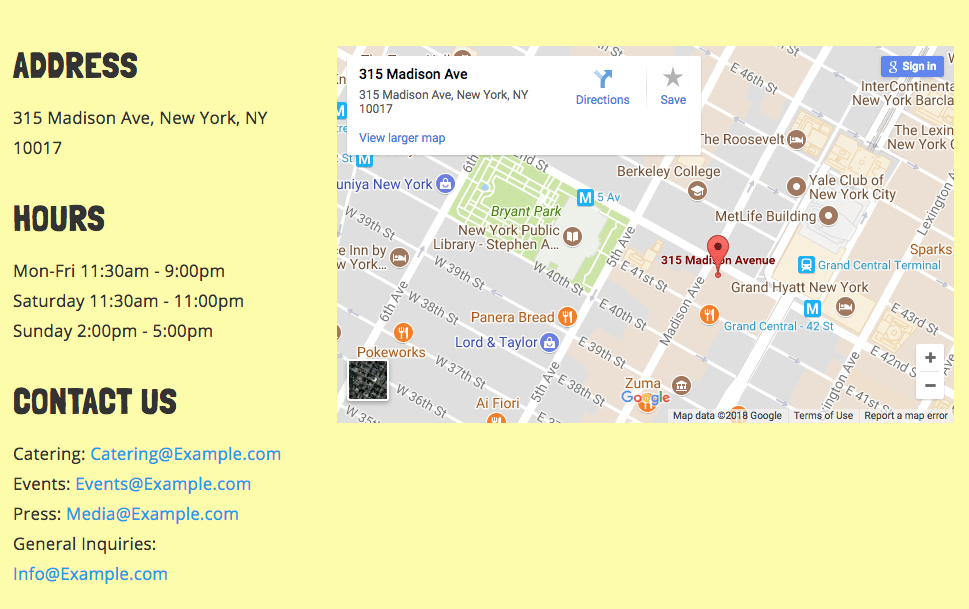
- Location. Displays your address, hours, and contact information, plus an embedded Google Map.
- Gallery. Adds a simple image gallery to your homepage.
- About. A place to add a short bio, menu outline, or mission statement.
- Email Capture. An optional mailing list signup form powered by Mailchimp.
- Footer. Add textlinks, or graphics to the bottom of your site.
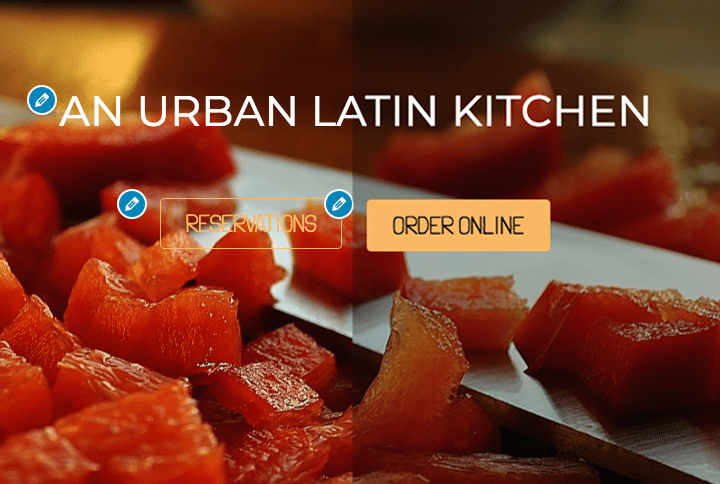
Section: Hero
The hero section comes with a large banner picture with bold, capitalized text, and 2 (optional) buttons underneath. Think of this as the main”headline” of your site. It ought to capture your visitors’ attention, supply a simple summary of your company, and provide visitors an easy way to proceed through the 2 buttons.To add an image, you can pick one of the three default images we have supplied (coffee legumes, bread, or even a cutting board with red peppers), or upload your own. If you don’t have a top quality image of your company just yet, you can find more royalty-free photographs on Pixabay, Unsplash, or even Pexels.
After a photo is uploaded, pay careful attention to your color scheme. If your photograph is dark, ensure your text white or brightly colored– or if your photo is fairly bright, use dark colored text instead. The”Background Color” allows you to further lighten or darken your image with the addition of a translucent layer over the image.
Replies: The left side is a raw picture. The right side includes a 30% transparent black layer.
For example, previously I included a transparent black coating over my image (right side). Notice how much simpler it is to read the text and button in contrast to the original image (left side).
Including Buttons
To add buttons, simply input text, and a URL where the button must lead. Also pick a colour and button design that fits with your site theme.
To remove a button, simply delete the text and URL. Change the button style, and after the preview screen refreshes, you’ll no longer see that button.
Section: Location
A simple menu to include essential business information, such as your address, hours of operation, and contact info. This section also offers an embedded Google Maps widget that shows your address for a pin on the map. To put this up, you will want a Google or Gmail account (which you may create for free), follow these directions from Google to get an API key.
Section: Gallery
A very simple gallery to display photos of your dishes, dining room, or guests. You can upload as many photos as you like. The photographs will appear as thumbnails, and people can click to zoom-in.
“Layout Columns” affects the number of columns on your photo gallery. You can use it to increase or decrease image sizes. For instance, shifting it to 3 will feature bigger rows of 3 pictures each.
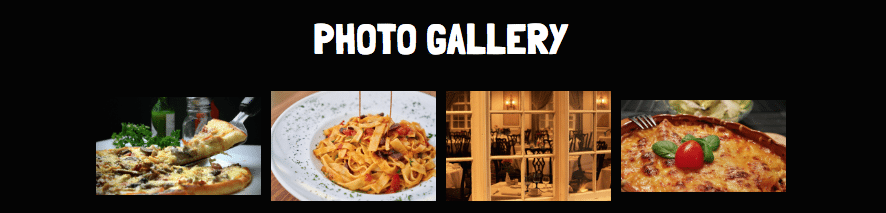
Add as many rows/columns as you enjoy. Visitors may click to zoom in on photos.
Section: Around
Insert a paragraph description of your restaurant. This segment is hidden by default, so in the event that you want to use it, then ensure that you allow it under”Section Order.” The reason we have maintained this segment hidden is because it will not be mandatory for most restaurant websites. Your main goal is to get visitors to your purchasing page, your own menu, or to find your address/contact info. A text-based section similar to this is only going to distract from the important features on your homepage. Instead, we’ll demonstrate how you can make a different”about” page later in this guide.
The exception is when there is an important thing you want to communicate, and there wasn’t enough space on your Hero section… e.g.”Serving all locally sourced farm-to-table foods with vegan choices,” or even”Located in one of those original hideouts of Al Capone; revived with original decor” In case the message is critical to your branding, then make sure its displayed front and center.
Section: Email Grab
This is an optional section for Mailchimp users who wish to add a newsletter signup form for their website. Simply write a header and subheader, then add your Mailchimp API Key and List ID.As with all the segments, you are able to move email capture to where it fits best in your site. By way of example, if email marketing is among the top priorities, move it just below your hero to maximize engagement. Only head to”Section Order” and drag email capture above the other segments.
If haven’t started email marketing yet but are thinking about trying it out, Mailchimp includes a free variant for smaller companies. Click here to sign up, or learn more about what they offer in our email marketing software buyer’s guide.
Section: Footer
Such as the header, your footer appears on every page of your site. It is typically utilized to post site credits, photo credits, and copyright information. You can also add up to 6 accolades, which are little icons that signify awards or accomplishments for your company.
Accolades may consist of restaurant awards, certificates, press links, social networking links and much more.
Simply click”Insert new Accolade,” and upload a picture. Ideally this should be a transparent PNG, so it doesn’t clash with the background colour of your website. In addition you have the option to join a URL, e.g. the content that mentions your enterprise.
To find these logos, just use Google Images. Set the color to”transparent” on the top menu bar.
Navigation Menus
Create your main navigation menu, which will show up on the web site header.Click”Produce new Menu” and name it”Main Navigation” or anything comparable. Check the box which states”Navigation Menu” and click Next.
Click”Add Items.” This opens a menu where you can choose which links to improve your navigation bar. As you’ve only created 1 webpage up to now (House ) there will not be too many choices. Click”Home” for now– you can add more later.
As soon as you’ve completed making edits to the customization menu, then click the equipment icon up top and select”Save Draft.” Click on the X to return to the main dashboard. You can return into the customization menu at any time to keep working.
Step 4: Create Your Food/Drink Menu
Most restaurants include their menu among 2 ways: They either upload an image of the menu, or type it out on a webpage with a couple pictures added for embellishment. I highly recommend the 2nd option, since menu scans can be hard to read on cellular. Additionally, typing out your menu makes it increasingly prone to appear in search engine results.
To design your menu, we advocate the free plugin Food and Drink Menu. You’ll come across a prompt on the dashboard to put in this. Click”Begin installing plugin.”
If you still prefer to upload a picture of your menu instead, you can jump to the next measure, where we will describe how to make a new webpage and add an image.
Click Box For Instructions
Installing Food and Beverage Menu Plugin
When you have clicked”Begin installing plugin” you will be prompted once more to click on”install.” This will take just a few moments.Once complete, click”Return to Required Plugins Installer” and then select”Activate” under Food and Drink Menu.
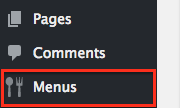
You should now find a new icon appear on the left side of your display. If you do not see”Menus” such as in the picture below, try refreshing the page. If you still don’t see it, double-check which you activated the plugin throughout the previous step.
Insert Menu Faucet
Hover on the menu icon, and choose”Menu ” The very first step to designing your menu would be to bring the various sections (e.g. appetizers, entrees, beverages) you’ll be serving. 
Go on and incorporate a few different menu segments. You always have the option to add or change these later. For your slug, form the exact same word in all lowercase. Use a hyphen instead of a space if there’s multiple words (e.g.”specialty-dishes”).
Insert Menu Items
Now put over the menu and select”Menu Things.” Click”Insert new menu item” in the very top. On the next page you will get to add a single menu item. There’s 4 Important areas for each item:
Remember these 4 fields for every menu item
- Menu Item Title. Add at the very top.
- Description. Insert in the huge box below. To include a photo, click”Insert Media.”
- Menu Sections. Choose which section or class this thing belongs in.
- Cost. Last but not least, don’t forget to add the price at the lower right corner.
Once complete, click”publish” and replicate for each menu item.
End Your Menu
Once all your menu items have been added, hover across the Menus icon on the toolbar, and now “Menus.”
Click”Add Menu” at the very top. Give the menu a name (e.g. Dinner, Brunch, Catering), scroll to the bottom where it says”Menu Layout.”
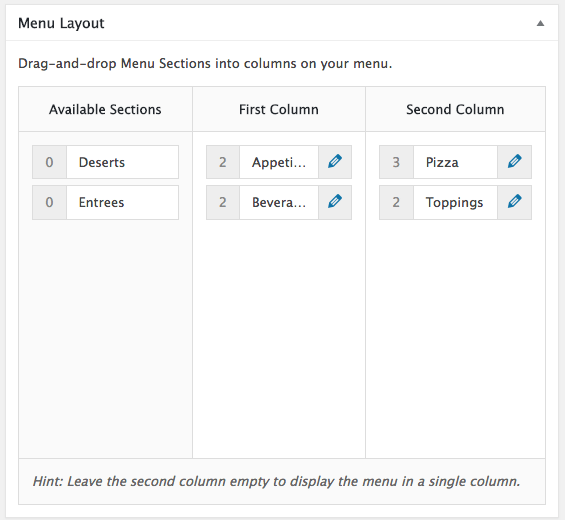
Here you are able to drag the various menu sections you’ve created to design your menu page. Place them in one of two columns, and then drag and drop to organize the order. When you’re finished, click”Preview Changes” in the top.
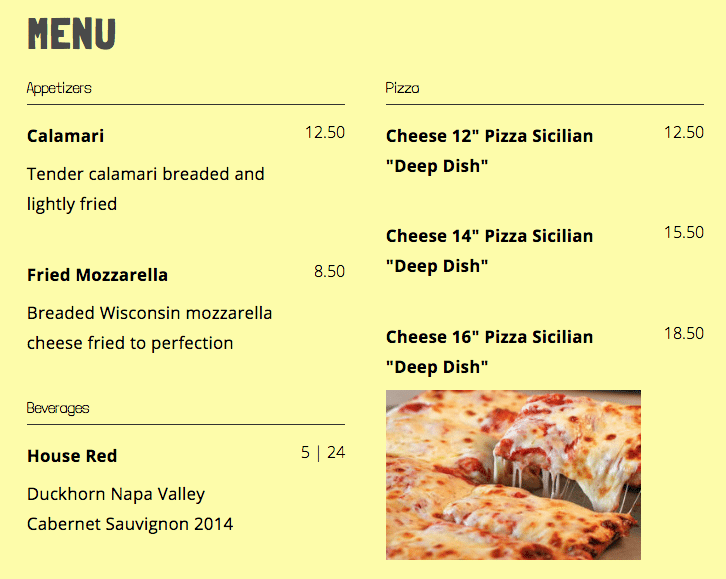
Once you’re happy with your design, click on”Publish”
Once your menu (or menus) are completed, remember to add the menu into your main navigation bar.
Head to Look > Customize > Navigation Menus > Main Menu
Click”Add Items” and you must now see the food menu you just created as one of the choices.
Step 5: Insert More Pages For Your Site
While not always necessary, most small business owners prefer to add additional pages to their site, for example About, Contact, Deliveries, Catering, or Our Story. It provides you the opportunity to add extra information without making your homepage too crowded. If you are publishing an image file to show your food/drink menu, then this is also how you create the menu page.
To create a page, return to your dashboard and click”Pages” on the left toolbar. Click”Add New” in the top of the page.
For each page you create, there are 3 key elements to look out for:
- Page Title. Add at the exact top.
- Page Slug. The URL of the page you are creating; add just beneath the title.
- Page Contents. Add in the large box below. To add a photo, click”Insert Media.”
Once completed, you can preview your page, save it as a draft, or just click”Publish” to go live. You always have the option to make edits afterwards, even after it’s published.
Create a Blog For Your Restaurant Website
If you would like to produce a website to post news updates, share recipes, promote special events, etc.. WordPress is an excellent platform for it.
Just visit”Posts” on the right left menu and then click”Add New.” Just like making a new page, you are going to add a name, write text and insert images/media content.
I recommend saving each blog posts under the same category title, like”Blog” or”Updates.” This way, adding your blog into your navigation bar is simple. Just click”Add Items” >”Categories” >”Blog”
If you wanted to make 2 different blogs (e.g. one for recipes, another for news and upgrades ), then only use 2 distinct categories. Now you can link to them separately on your navigation bar.
Final Step: Publish Your Site
When you are ready to go live, click on the Bluehost button on the left menu bar.

Now find the box which says”Launch Your Website” and click on the button”Launch”

This is going to make your website go live. You should now be able to form your URL in a browser and reach your site. If you are getting an error, return to Step 2 and confirm that you entered the right URL on the”settings” panel.
The Most Important Thing
Besides a domain and website, Bluehost also gives you professional email accounts that use your domain ([email protected]). To set this up, have a look at our guide on creating a business email accounts.
As a proud new site owner, you will also want to learn some of the basics of SEO, or search engine optimisation. Our guide the way to rank high on Google searches covers all you will want to understand as a restaurant. Be sure to also check our marketing section for even more hints and suggestions. And if you’re just starting out, our restaurant floor plan manual has plenty of hints that may help save you money and time in your own launch.
If you’re still having trouble setting up your site, or have any remaining questions about the best way to use Bluehost or WordPress, you could also drop us a line on our user forum.