
The principal reason most small business owners use Square would be to process payments, largely credit and debit cards. Together with Square, you can start accepting debit and credit cards within minutes, on the go or anywhere your business takes you. In this guide, we will walk you through how to complete a sale on Square POS (Point of Sale).
Step 1. Subscribe to a Free Square Account
If you haven’t done so already, the initial step would be to click here to register for a free Square account. Click”get started”, and answer a few basic questions about your company to complete the signup process.
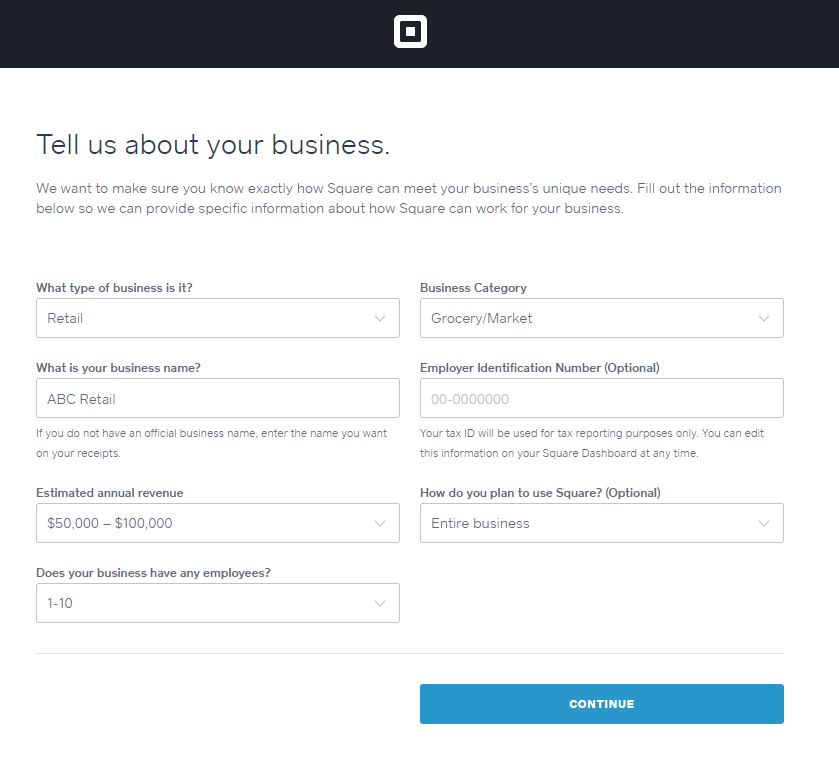
It is optional to put in an Employer Identification Number (EIN), but we suggest putting it in if you have one to prevent IRS withholdings/audits. Once you’ve completed your enterprise information, click”Continue.”
You’ll then be asked a few personal questions, such as your date of birth and the last four digits of your Social Security Number. Don’t worry about providing this information–Square doesn’t carry out a credit rating. It’s simply to verify your identity.
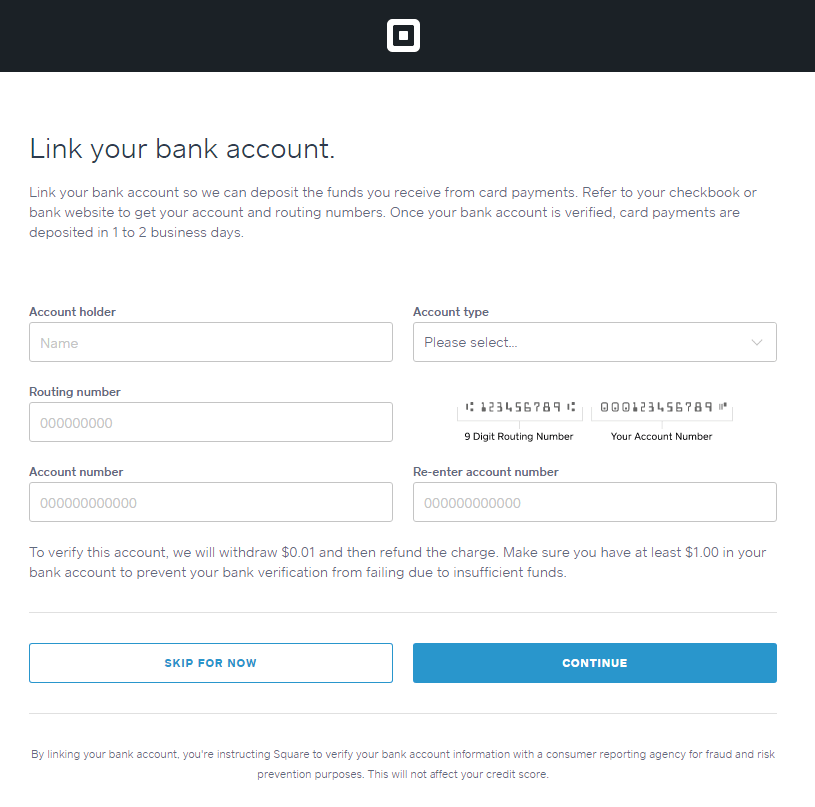
Finally, you’ll link your business bank accounts so you get paid when your customers pay you! You may bypass this step and return to it afterwards, but it’s faster to link your account now if you’ve got one. Credit and debit card payments are deposited to your account within 1-2 business days.
Measure 2. Choose a Charge Card Reader
After supplying your business and personal info, Square gives you the choice to choose a credit card reader, which they will mail to your place of business.
Square offers many credit card readers. You can either pick the free Magstripe charge card reader or the 29 Square reader for contactless and EMV chip cards. We recommend choosing the latter since credit card companies today punish companies for fraudulent credit card transactions if they do not have processor card readers. Read more here about how to protect your business from fraudulent credit card transactions. Contactless payments, for example Apple Pay, are becoming more popular as well, and you’re putting yourself at a disadvantage if you’re unable to accept such obligations.
You need to get the processor card reader in the email in 5-7 business days. If you choose the free Magstripe reader, you can define how fast you need it on another page.
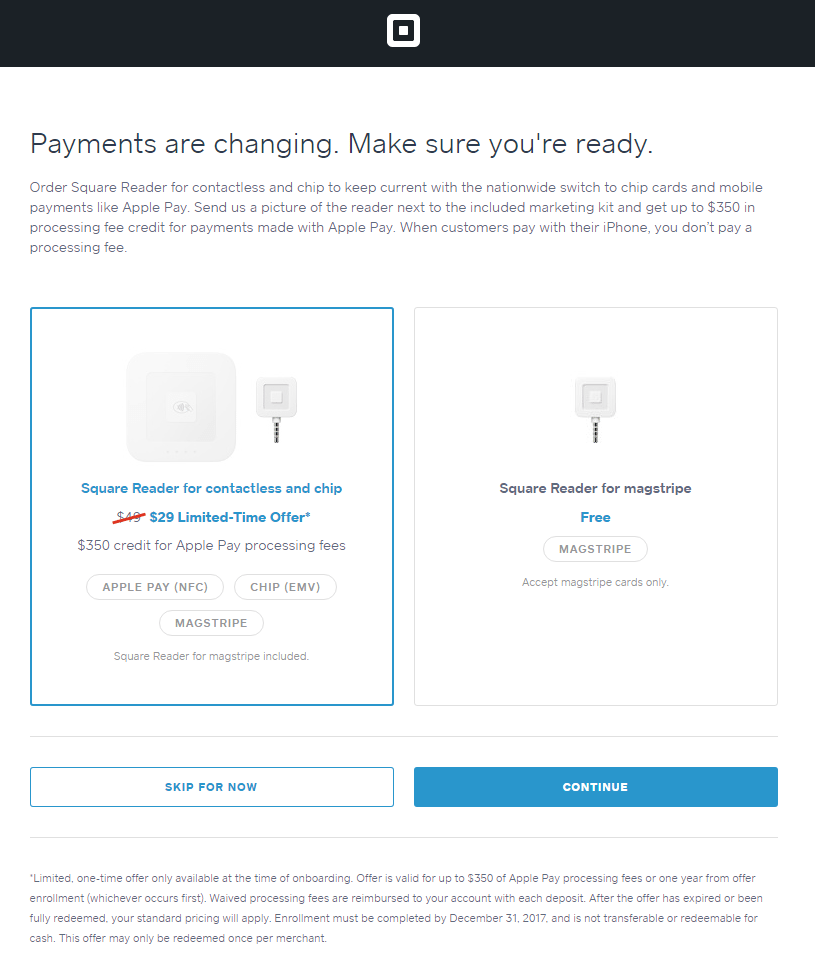
Order Free Chip Reader
Measure 3. Download the Square POS Program
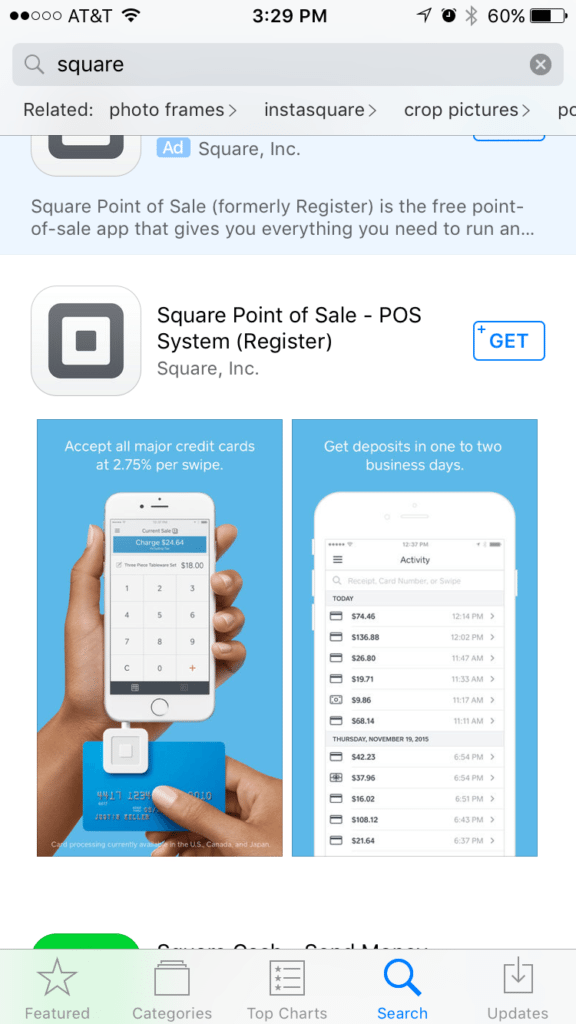
Before you can take a purchase, you need to get into the Square POS app (formerly called the Square register program ) onto your cellular phone or tablet. If you use an iPhone or even iPad, click the App Store logo and seek out”Square.” The first result is Square Point of Sale. Download this app onto your device, and you are ready to take your first payment!
The practice is the same for Android users. The Square Point of Sale app can be found in the Play Store.
Step 4: Configure Your Store Settings
Before processing your first sale, take a moment to configure the shop settings on your Square dashboard. This will help save you time when you’ve got a very long line of customers since everything you require, such as receipts and customer information, will already be kept on your account.
To get the settings section of your dashboard, sign in and navigate to”account & settings” from the left tab.
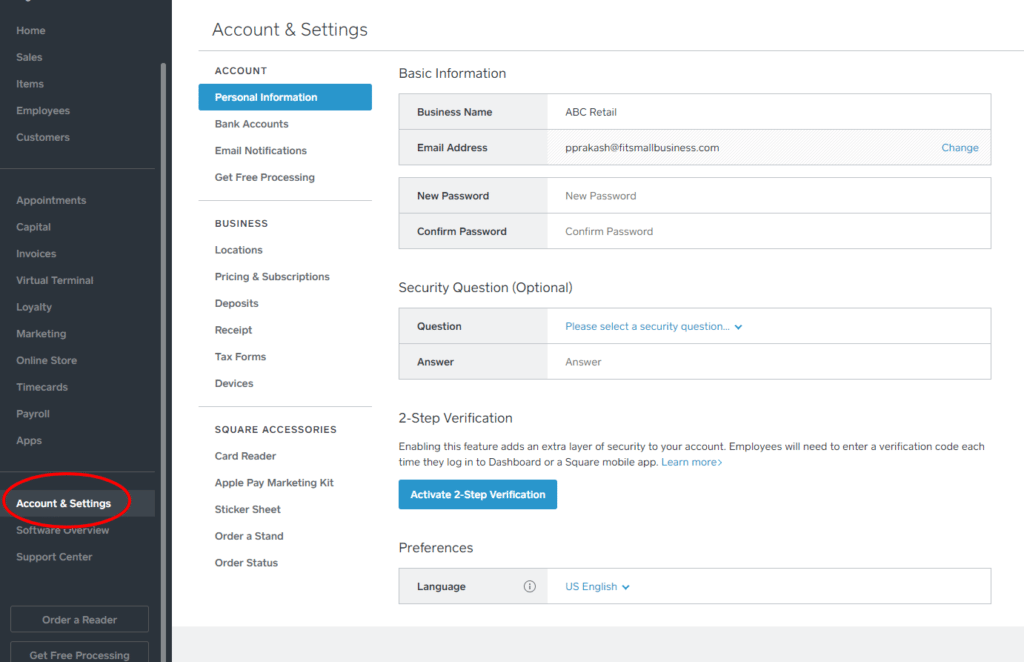
Here are what you can configure on your dashboard:
- Change private and company information, such as address or contact number.
- Bank balances — Set or modify the bank account that your money is deposited right into
- Locations — Add a new physical location for your company if you operate numerous storefronts
- prices & Subscriptions — Watch how much Square charges you to get different types of trades and solutions, for example Square Appointments (Free for one user) and Square Loyalty ($25/month per place ), both ideal tools for health spas, salons, and other service businesses.
- Deposits — Watch how fast your money gets deposited. For an additional 1% of this balance, you may set up Instant residue.
- Receipt — Customize the text, logo, and colors to the reception your customers receive.
- Tax forms — Set up your taxpayer information and 1099-Ks. A 1099-K is a tax form that online vendors use to report earnings from credit card sales.
- Devices — Should you use a number of devices to take payments, you may produce codes to quickly sign in on almost any device without needing to type in your username and password every time.
- Square accessories — Buy extra card readers, a tablet stand, and other hardware.
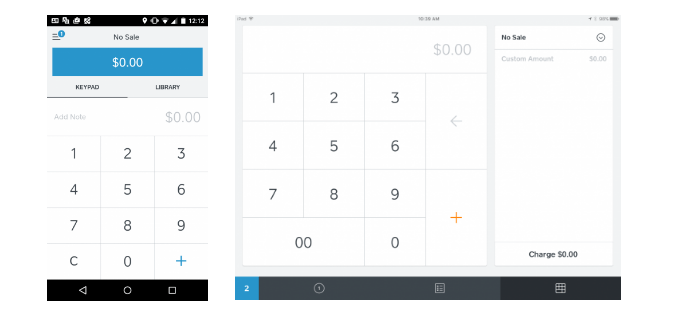
Step 5: Input your Sale/Transaction Amount
After logging in, the app will request that you enable your mic, place services, and push notifications so that everything works correctly. Following that, you will be told to the keypad display, and the trade balance should be $0 (as shown below).
From that point, you just use the touchscreen keypad to type on your Square trade amount.
Step 6: Click the”Charge” button
As soon as you have the transaction amount inputted, simply click on the”Charge” button, which will take you to the payment screen.

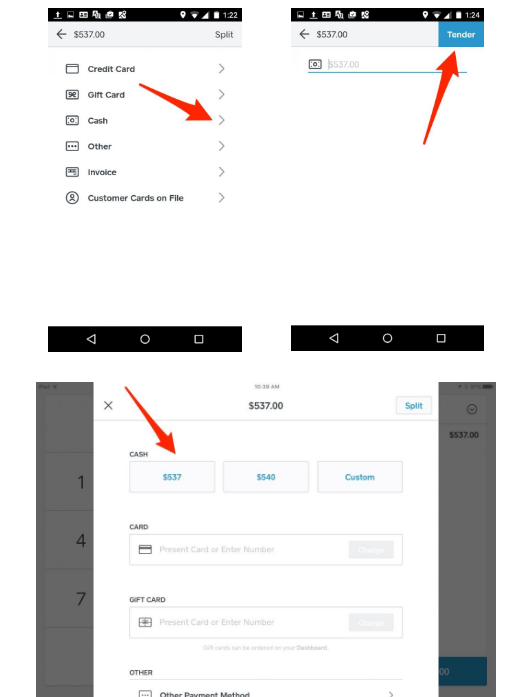
Step 7: Choose Your Payment Option (likely credit card in most cases)
There are 2 different approaches to select payment. The first is simply to select the appropriate method of payment, i.e. cash, other, etc..
However if you have a credit card reader connected, you could also just simply swipe or insert (EMV) the card or position the reader in front of the card (for contactless payment choices like Apple Pay), and it’ll automatically be approved as the payment for this transaction. In this case, I simply selected”cash,” since I didn’t wish to process a genuine credit card transaction.
On a tablet, there are multiple cash choices, like the specific amount of 537 or round out like $540. You pick a choice, and you are good to go. On mobile, it only automatically inputs the exact total, and then you may change it if needed and hit on”Tender.”
If you need to make change, Square will calculate that and let you know exactly what you want to give back to the customer. In this case, I just stated the money amount was accurate.
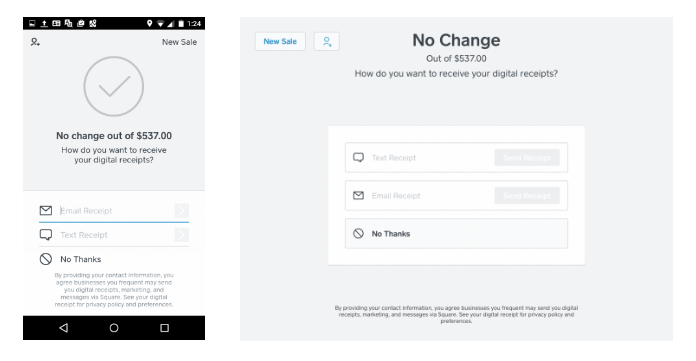
Measure 8: Pick a Receipt Option and Complete the Sale
As soon as you have completed payment, Square gives your client the choice of what kind of receipt they would like. You can send an email or text receipt, or simply select”no thanks” if your client doesn’t require a receipt. The system will store their email or number so that they don’t have to supply it every time they pay a vendor which uses Square POS.
Bottom Line
That’s all there’s to it. Now you understand how to process a purchase on Square POS. You may make this even easier by adding inventory items to your Square register. This stores the item and its related price points on your account, and inventory counts automatically correct when you sell a product. But stock management is merely one of Square’s many business-friendly features. See all of them as well as the related Square fees here.
And if you’re considering what clients think about Square POS, read testimonials here. Prepared to purchase your free chip reader and begin making sales? Click the button below:
Visit Square