
Until recently it would cost several thousand dollars to get a professional to build your website. But with today’s easy to use DIY site builders such as Weebly you can now have a professional quality small business site up in under an hour.
Weebly stays one of the leading website builders out there — boasting over 40 million sites to date. Weebly is a superb solution for small business owners that are looking to construct a website quickly, easily, and at an affordable price. Keep reading to find out how to up your website using the Weebly website builder in 7 easy steps.
Visit Weebly
Step 1: Sign Up To Your Weebly Website
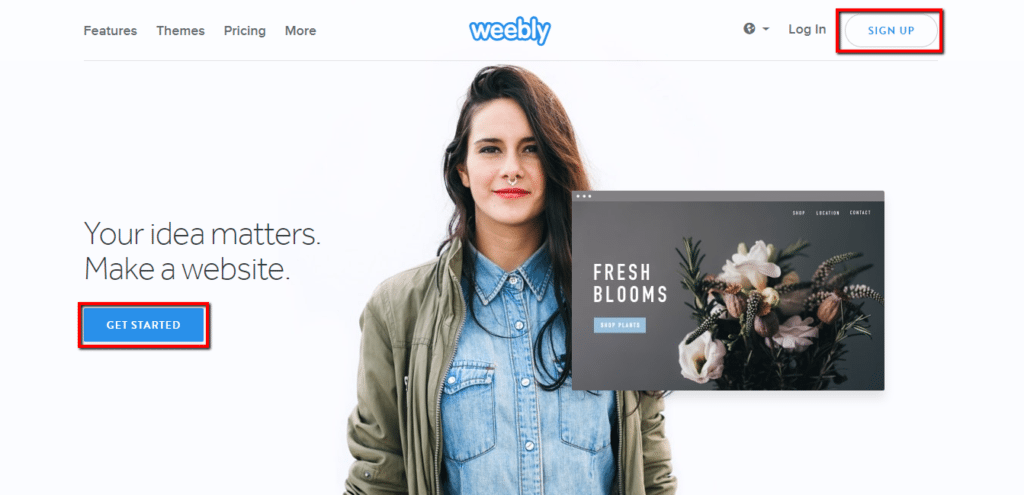
The first step, is to visit Weebly.com. Once there, you have to click on the”Subscribe” or the”Get Started” button onto the page.
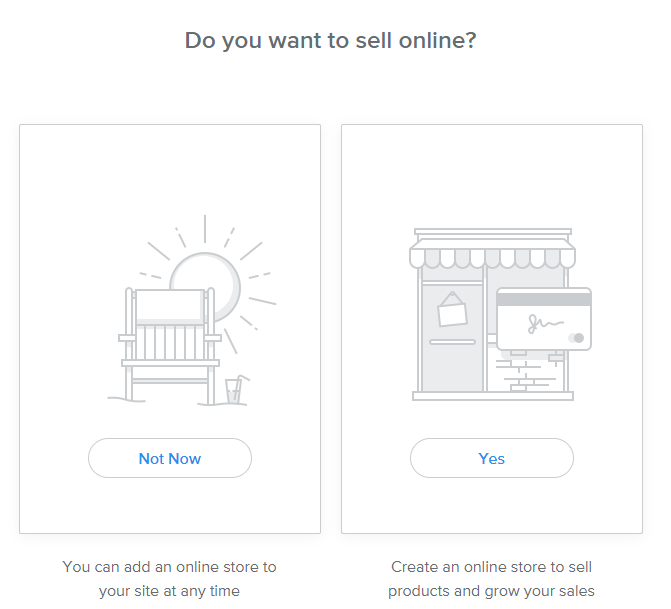
Next, you’ll be routed to a sign-up display. Put in your whole name, email, and a password to get started. After you click the”Sign up” button, you’ll be taken to a page which asks you if you want to sell online or not. Don’t be worried if you’re not selling online yet but are open to doing this in the long run. It’s possible to add an internet store to your website at any moment. Therefore, if you are going to use your Weebly website solely for blogging, you can pick”Not Now”.
Step 2: Pick a Theme
The next step is to determine which kind of theme (or layout ) you would like to use. Weebly provides a vast selection of new, modern motifs that can work for many different uses. Particular themes will likely make more sense for the company than others.
Several important things to keep in mind when picking a theme:
- You are able to change themes anytime — The Weebly website builder, unlike rival Wix, permits you to change topics at any moment. After you change an issue, each the info you’ve created is automatically imported into the new subject, which means you don’t eliminate anything. So, it really isn’t that big of a deal that subject you begin with.
- Weebly has industry-specific themes — Though any motif can be tailored to fit almost any market, many are pre-designed for a specific sort of company. If you want as little work as you can pick a theme that’s already set up for your own industry. Then, actually all you’ve got to do is just change the pictures, page names, and text.
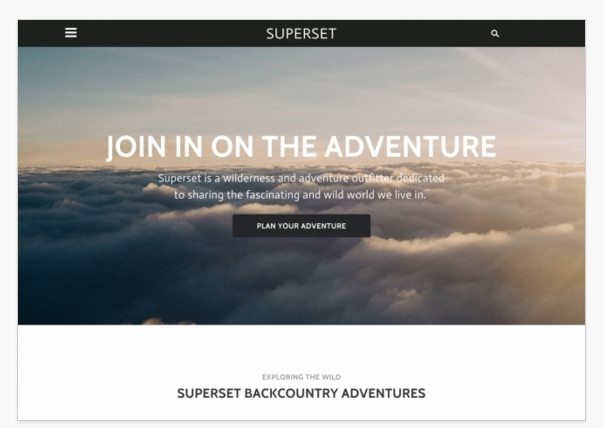
- Always ask,”What am I trying to achieve?” — Some websites are better at accomplishing certain goals compared to many others. By way of instance, if your primary goal is to get leads employing an action button, then a theme like the one below is ideal. Rather than having a variety of areas to click, it just provides one option,”Plan Your Adventure,” and makes the central focus.
Great theme choice if your Aim is to get prospects
If you are interested in finding more of a informational website, then you likely want a theme like the one below. It’s clear tabs at the top where your visitors can navigate to various parts of your Weebly website to find out more about your small business. Additionally, it has a several hyperlinks to other pages on the website as you scroll down the site, which can help people to click around and see what you’re about.

Great Solution for an informational site
You can preview any theme you’re interested in by simply clicking on the subject picture. Once you’ve decided on a topic, just click”Start Editing” at the top right hand corner of the Theme Preview page.
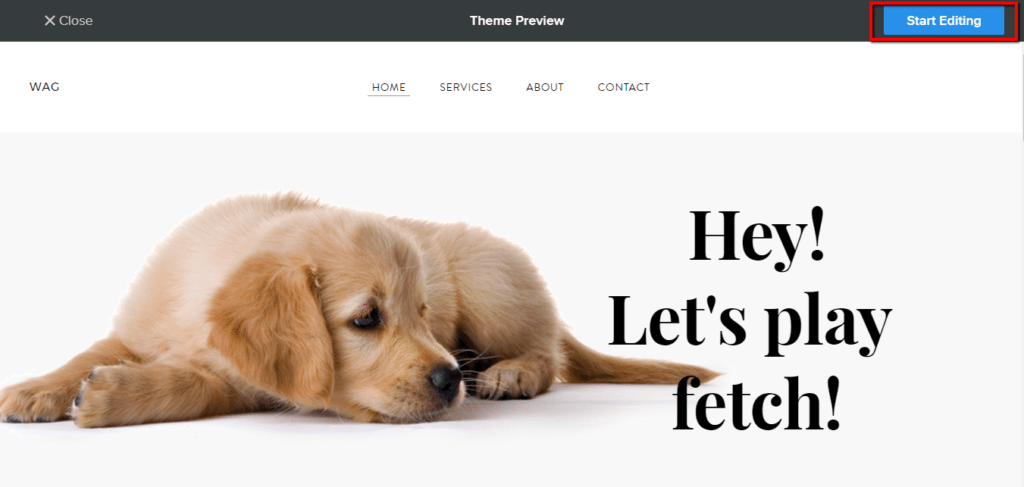
Once you’ve chosen the theme you want, hit”start editing”
Step 3: Choose Your Domain Option
The next thing you will see is the domain option page. It looks like this:
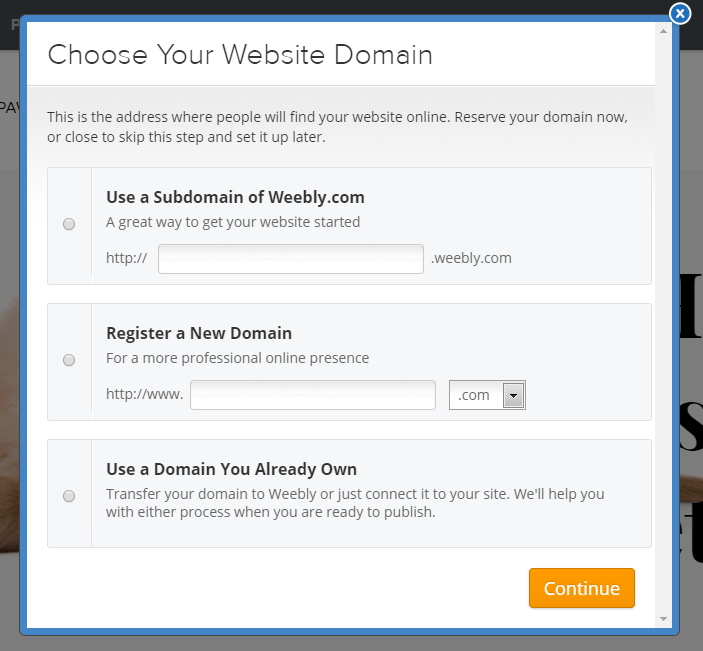
If you’d like a free Weebly site, your only option is to utilize the subdomain of Weebly.com. Your domain will not be as unique, but you won’t have to pay anything.
If You Would like your own unique domain, You’ve Got 3 choices:
-
- Get one through Weebly — It is free for the first year using a paid program and then around $20/year after that.
- Buy one through a third-party supplier and join it — We recommend Namesilo. Check out why within our domain registrar buyer’s guide.
- Connect one you already own — If you already have a exceptional domainname, it is possible to join it to your Weebly site. It’s a little complicated, but many domain suppliers can do this for you if you ask. If you want to do it yourself, here is a guide.
Keep in mind, if you wind up using your custom domainname, you will have to buy a Weebly site premium plan. Step 7 has a breakdown of their program choices and features they include. All paid programs permit you to acquire a unique domainname.
For tips about how best to choose a domain name, have a look at our guide.
Step 4: Construct Your Weebly Website
Once you have picked your domain name, then you’ll be accepted to the Weebly site builder screen, and that’s where you will actually do all of the significant constructing of your site. Here’s what it looks like.
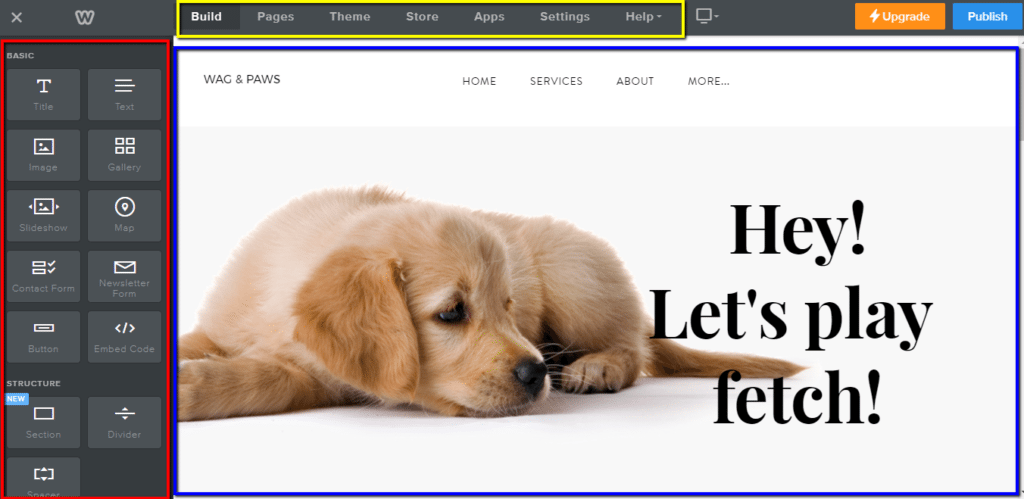
Here’s a breakdown of this Weebly website builder:
- Element Bar — The element pub is on the much left-hand side of the builder, as shown by the red box over. “Elements” are only all the components you may use to construct your site. To add an element to a page, just click on a component (and hold) and then drag it in which you need it to the page to the appropriate.
- Site Tabs — Just Like most builders, the Weebly site builder includes a navigation tab (yellow box) along the top of the page. The tabs are,”Build,””Pages,””Theme,””Store,””Apps,” and”Settings.” To change the larger parts of your site, just click the corresponding navigation tab to edit settings.
- Site Preview — The blue box is about the website preview region which shows the real elements on your website. This middle field of the builder is basically an editable record of what your website will really look like.
Adding & Editing Pages
To add, delete, or edit your page settings, just click on the”Pages” tab on top of your Weebly site builder screen. You will then be brought to the pages screen.
When you first start, you will likely only have a few active pages. In this subject, you begin using a”Home,””About,””Services,” and”Contact” page, as shown below.
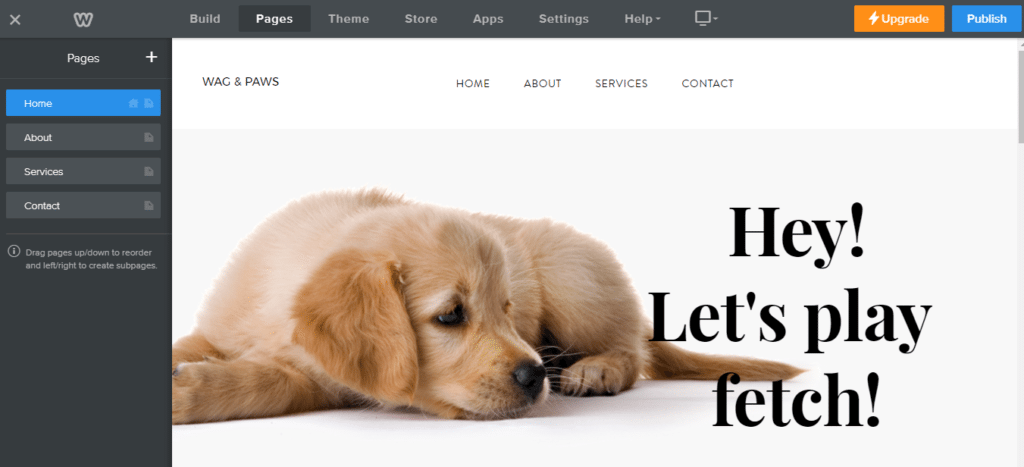
To add a page, just click the snowy + sign near the top left of this webpage (highlighted by a red box in the image below). If you would like to edit or edit an existing page, click the little folder icon next to the page title (highlighted by a blue box at the picture below).
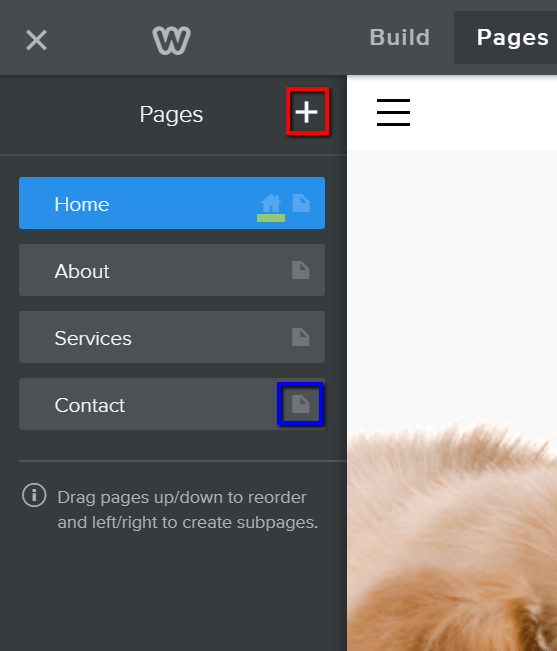
You are able to change page order simply by dragging each page title above or below the other names. There are several important things to note here:
- Your top page is your default homepage — If you look closely, you will notice a little house icon (underlined yellow in the image above) next to the”House” page folder icon above. That designates that of your pages would be your”Homepage,” the very first page visitors will see on your Weebly site (at least in most instances ). Just remember, whichever page you have on top will automatically be assigned as your site.
- It is possible to drag-and-drop a webpage into the right to create a subpage — If you want to create a webpage that doesn’t show up in your main webpage tab, then you will need to create a subpage. To do that, you merely create a page like regular, rearrange it so the page is under whatever principal page you want it to be connected to, and then drag it to the correct. This will create a subpage. As shown below, a subpage is indicated by an indentation from the tab. In cases like this, the”About” page is presently a subpage of the”House” page.
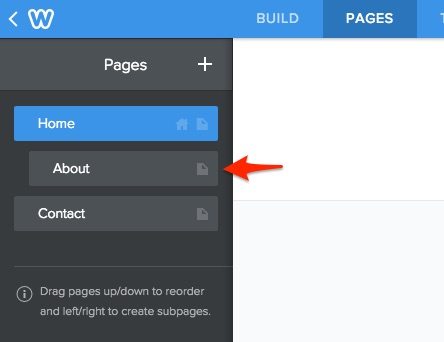
- Your most important pages in your tabs will also be your navigation webpages that visitors will see — In the screenshot above, the”House” and”Contact” pages are main pages and the”About” page is a subpage. This means that just the two main pages will show up on your nav bar. The subpages will appear whenever the related principal page is hovered over by a visitor’s mouse.
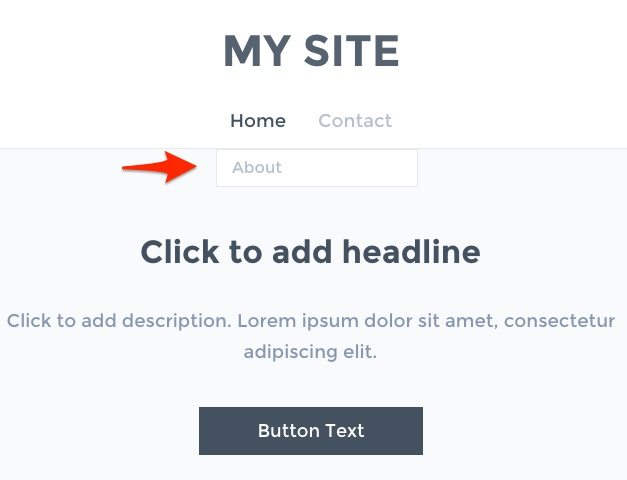
From the picture below, you simply find the”Home” and”Contact” pages at the main bar, but if you hover over the main page (as I did when the screenshot was taken), then the”About” page will appear in a drop-down tab.
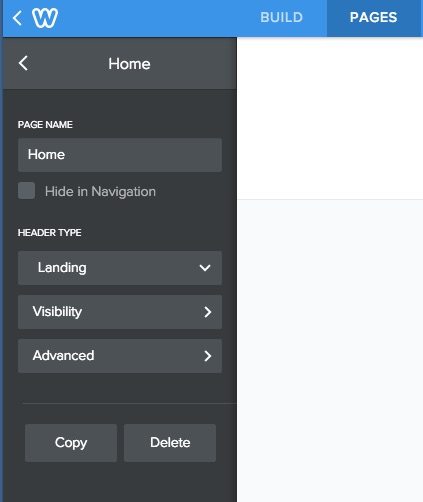
The final point to mention here, is that you can edit the preferences on each page by clicking on the little folder icon mentioned previously. When you do, that will bring up this page, which allows you to earn an assortment of changes. You can decide whether to hide the page in navigation, then change the manner of your total page design (landing, dab, name, etc), and edit innovative settings too (page description, meta keywords, etc).
Altering or Editing Text With the Weebly Website Builder
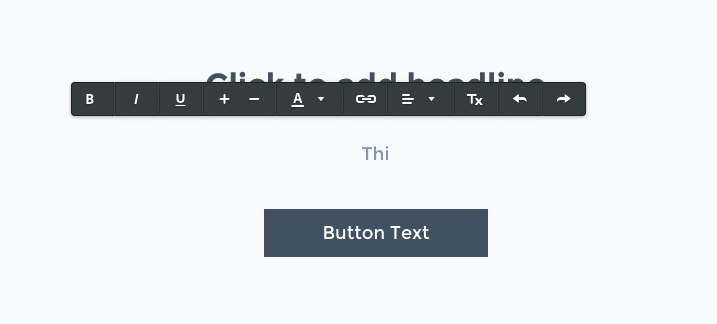
Changing or editing text in the Weebly site builder is as simple as clicking on the text or name you want to edit. If you’re just starting out and haven’t entered any text yet, then the place will just go blank once you click on it along with a text setting bar will pop-up (as seen below). If you’re changing text you have inputted, then you are going to need to delete it before you add new. As you can see, I started typing the”Thi” in before I took the screenshot.
To edit the text inside a button, it’s a little more complex. You need to click the button, and then you will understand this window pop up. You want to click the”Button text” tab.
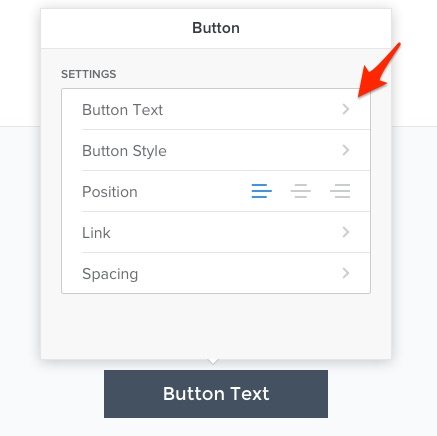
Then a window will appear in which you can just type in your text. Once you have entered your text, then you just click out of the window and the button must reflect your change. Here are the changes after I edited the text.

Adding or Changing a Image
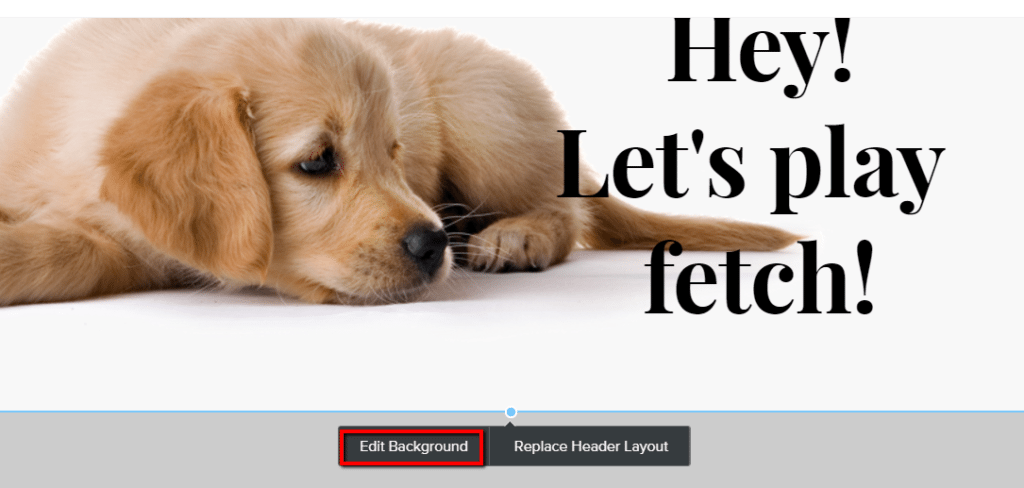
First off, let’s say you just wish to have a background image that’s already in a motif and just change it to a specific to your enterprise. It is simple. Just click the picture and after that you will be shown the options to either”Edit Background” or”Replace Header Layout”.
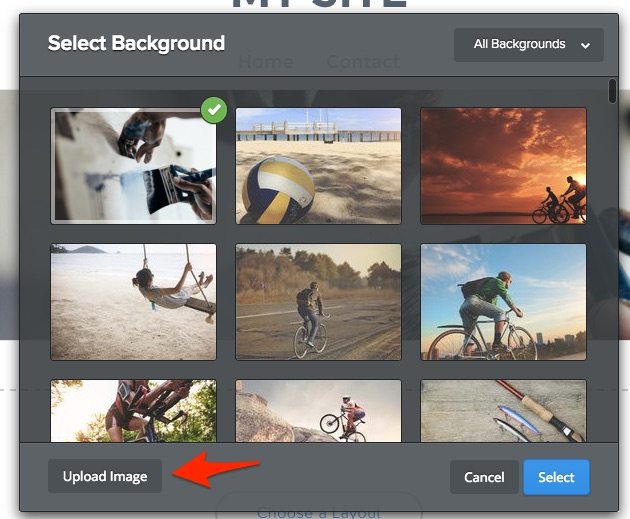
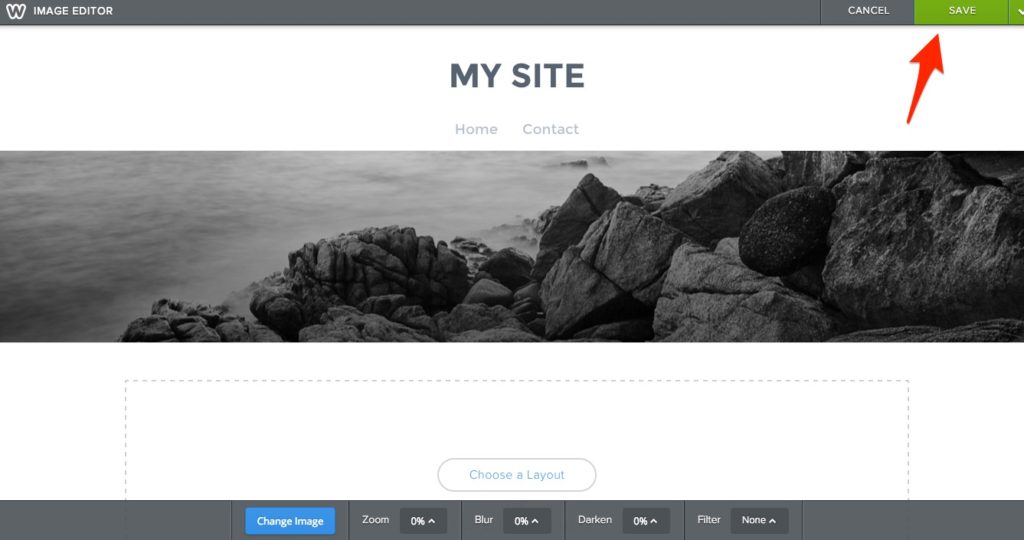
Once you click on the”Edit Background” button, you’ll be taken to a window where you’ll choose whether to”Replace” or”Edit” the current picture. Should you wish to replace, you will be directed to the Image Editor window, where you are able to upload a picture from your computer or choose from different images on Weebly.
If you’re selecting an image that is part of a theme’s page background, as is the case here, then you’ll find the window below as a popup. You will want to click on the”Upload Picture” button.
Then you will find this display, which will either allow you to pick a picture from the computer hard drive to include or you might also drag-and-drop a photograph here from the own desktop computer.
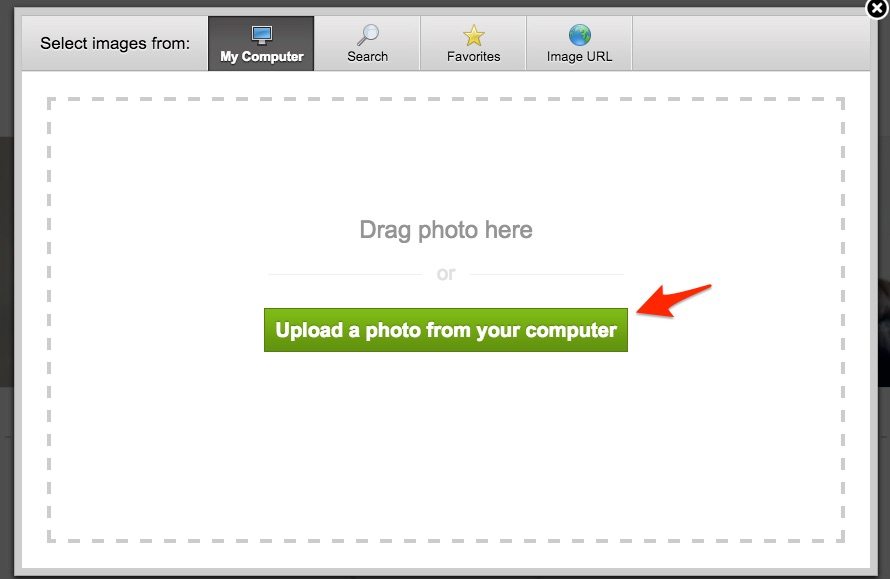
Typically, you are just going to select the”Upload a Photo in the computer” button, find your photo on your computer, and then double click on it. Then, it will reveal to you exactly what the photograph will look like on the webpage and then you’ll want to click”Save” in the top right to create it official. You will also have to select whether you want it stored only to this page or to all pages in your Weebly website when it relates to some header or background.
When there’s absolutely no picture already on a webpage and you just want to add you merely drag-and-drop the”Picture” section from the Weebly site builder components tab on the page, as shown below.
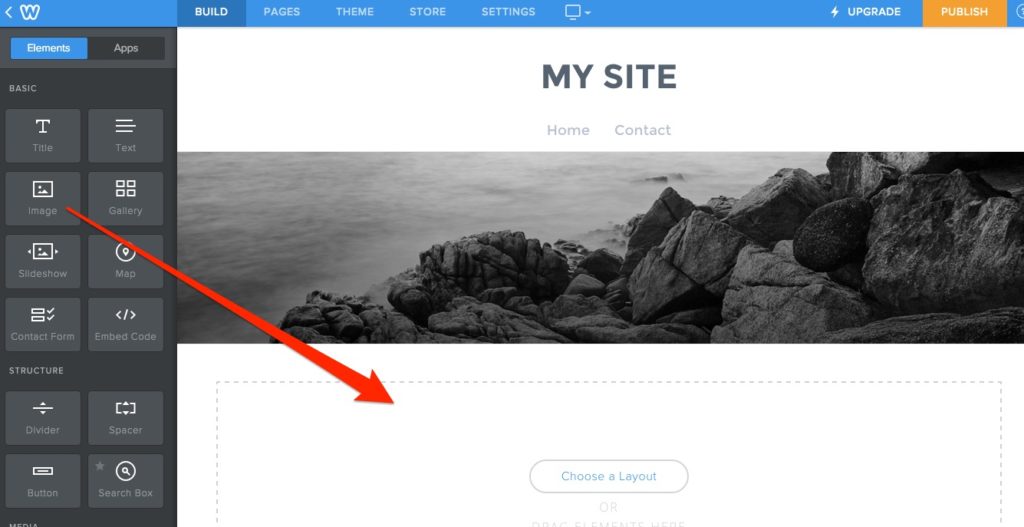
Once you’ve done this, you merely click the upload picture box that appears.

After clicking, you’ll get exactly the same window shown several slides earlier, with the green button that says”Upload a photo from the PC.” In this situation, all you have to do is click on that button, then find the file on your computer, double click, and it’s going to be automatically updated on your Weebly site, you don’t have to press”save” or anything.
Step 5: Investigate Additional Elements & Alternatives
The Weebly website builder provides you a lot of different component options. The issue, is that going over every one separately is well beyond the scope of this report.
For example, you can:
- Change your theme at any time
- Add maps into some webpage
- Establish a contact form
- Insert dividers or spacing
- Insert Many Different media, such as Videos and Audio files
- Insert Social Media Icons and Links
- Add a questionnaire
- And much more
The majority of these actions are pretty self explanatory once you are knowledgeable about the system. However if you are having trouble figuring them out, Weebly has excellent tutorials for all of these actions that can be found at their Help Center. The tutorials are extremely similar to this guide, detailing everything you need to do and showing a screenshot of what that looks like.
Step 6: Publish Your Weebly Website
Once you are finished with your initial editing, it is time to publish your Weebly website. Bear in mind, you can make changes to it at any time by simply going in the Weebly website builder, therefore it is not like you have to have it absolutely ideal until you go live.
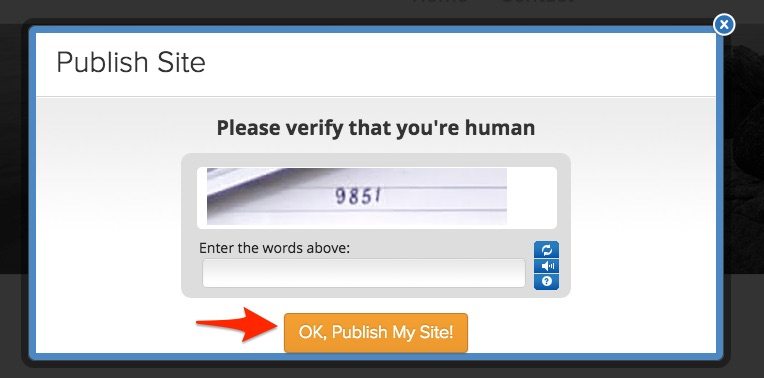
To print your Weebly site, just click on the orange”PUBLISH” button at the top right hand of your editor. As long as you’re using the free version, it will show you the domain choice window like it did early in the procedure. If you don’t need to update, just pick the”Use a sub-domain of Weebly.com” option and hit continue.
The last thing you will need to do is put in a code to confirm you’re a human, then hit on the orange”Ok, Publish my Site!” button.
Step 7: Decide What Sort of Plan You Need To Get Moving Forward
The free program might be more than sufficient for your website. But, we do not advocate the free version if you would like a professional website, as you won’t receive your own customized domain, and Weebly ads will display in your webpages. Plus, if you want to have more functionality or an online store, you will need to pay for a plan.
Here is a breakdown of Weebly’s strategies and what attributes are included with each. Obviously, the Weebly site builder is included with each program.
Free — Unlimited hosting, pages, Weebly Subdomain, Weebly advertisements, 500MB storage limitation, blog, email and chat support.
Starter ($8/month) — Free domain (1 year)hosting, no Weebly ads, unlimited storage limitation, promote to ten goods (3% transaction fee), email and chat support.
Pro ($12/month) — What within Starter Plan + telephone service, HD Audio and Video Players, in-depth website reporting, sell up to 25 ecommerce goods (3% transaction fee), site search, have up to 100 members.
Business ($25/month) — What in Pro Plan + unlimited membership, SSL security, unlimited ecommerce products, 0% transaction fee on all revenue, integrated shopping cart on your domain, digital products, inventory management, shipping and tax calculator, coupon codes.
Summary
For the typical small business owner looking for a site, the Weebly site builder is a great choice. It’s plenty of sound features, is cheap, and is straightforward. With this guide, you may have an expert looking Weebly site up and running at 60 minutes or less, without having to spend a penny! And, if along the way you decide you want to upgrade, you are able to do that at any time, making Weebly a fantastic choice to scale with your company as well.
Looking for design inspiration for your site? Check out these 10 landing page examples.